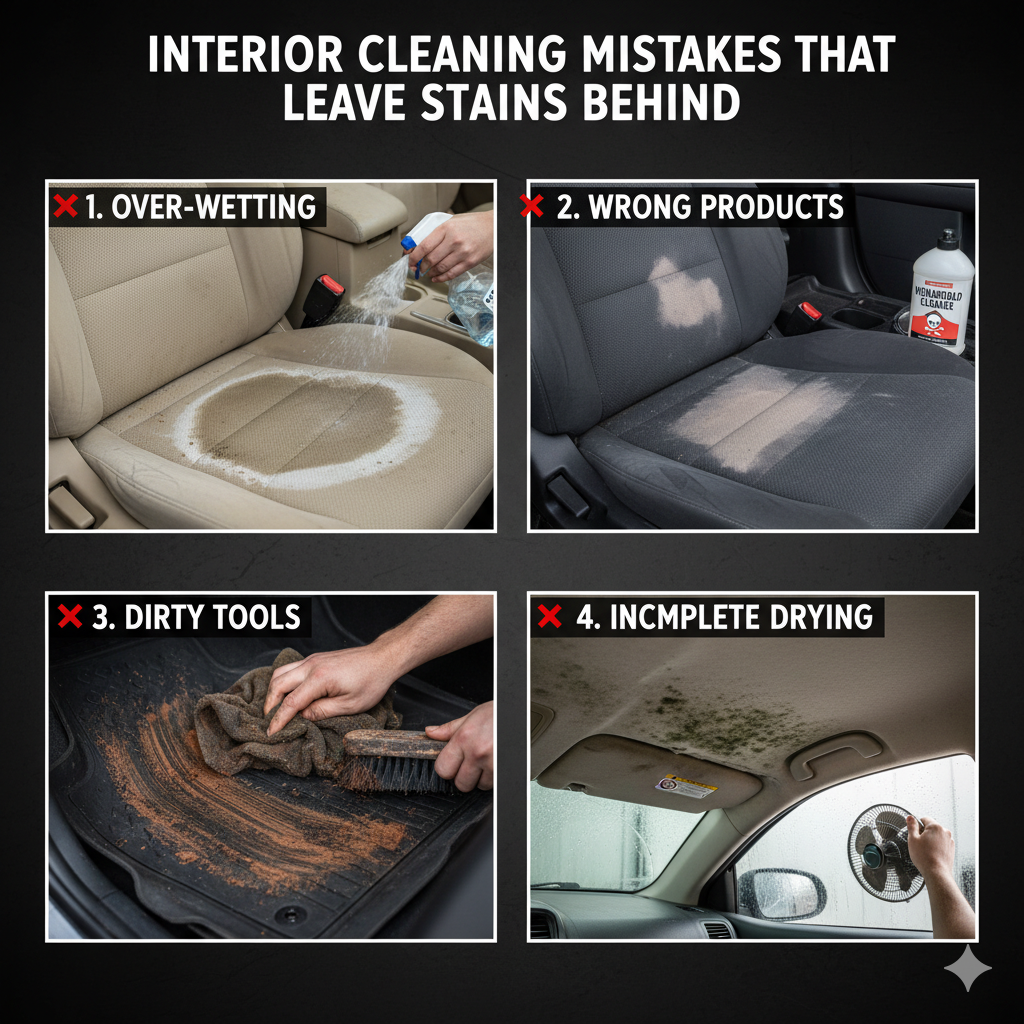
Trying to remove a spill quickly often makes the situation worse. Many homeowners make interior cleaning mistakes that leave stains, turning a minor coffee spill into a permanent mark. You want a spotless living space, but incorrect methods drive dirt deeper into fabrics and hard surfaces.
This guide breaks down exactly what you are doing wrong and how to fix it immediately. We will cover the correct techniques to treat carpets, walls, and delicate upholstery effectively.
What Causes Spills to Become Permanent?
Why do some spots refuse to vanish completely? Heat, friction, and chemical reactions cause most discoloration to lock into household fibers.
Avoid these specific actions to prevent permanent damage to your belongings:
- Applying excessive heat: Warmth bakes proteins into fabrics.
- Creating friction: Scrubbing damages delicate fibers and spreads the liquid.
- Using incorrect pH levels: Acidic cleaners ruin natural stone and wood.
- Leaving chemical residue: Unrinsed soap attracts new dirt.
- Waiting too long: Time allows liquids to penetrate protective coatings.
8 Interior Cleaning Mistakes That Leave Stains Behind
The way you react in the first few seconds after a spill determines the outcome. Review these common errors to ensure your maintenance routine actually works.
1. Rubbing Carpets Instead of Blotting
Grabbing a towel and aggressively rubbing a spill pushes the liquid downward. This friction damages the twisted carpet fibers, causing them to fray and look dull. Lateral motion also widens the spill perimeter, significantly increasing the affected area.
Always use a clean, white cloth to press directly downward on the damp area. Apply firm, steady pressure to absorb the moisture without agitating the material beneath. Continue turning the cloth to a dry section until no more liquid transfers.
2. Applying Hot Water to Protein Spills
Hot water is a logical choice for sanitizing a mess. However, heat causes proteins found in blood, sweat, milk, and eggs to coagulate. This chemical reaction bonds the substance permanently to the surrounding threads.
Instead, flush protein-based messes with cold water immediately. Use an enzymatic cleaner specifically formulated to safely break down biological matter. The American Cleaning Institute recommends cold water extraction for all organic household spills.
3. Using Ammonia-Based Products on Pet Accidents
Cleaning dog or cat urine with ammonia creates a massive problem. Urine naturally contains ammonia, so adding more of it reinforces your pet’s scent profile. This encourages the animal to return to the same spot repeatedly.
Furthermore, ammonia’s high pH level can strip the dye right out of your area rugs. You must use a dedicated enzymatic formula to neutralize the odor and break down the uric acid crystals. Saturate the area, let it sit for the recommended time, and extract the excess liquid.
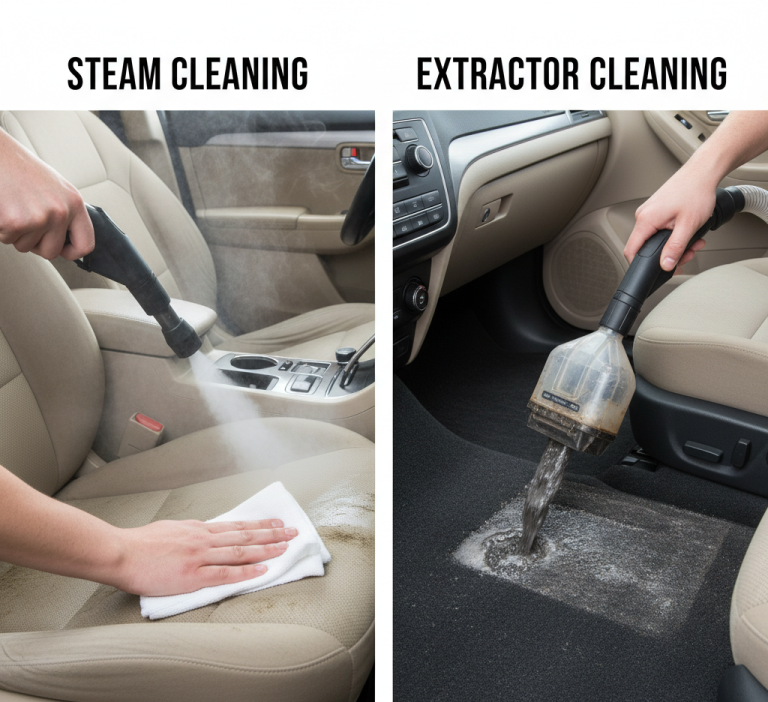
4. Drenching Upholstery with Liquid Cleaners
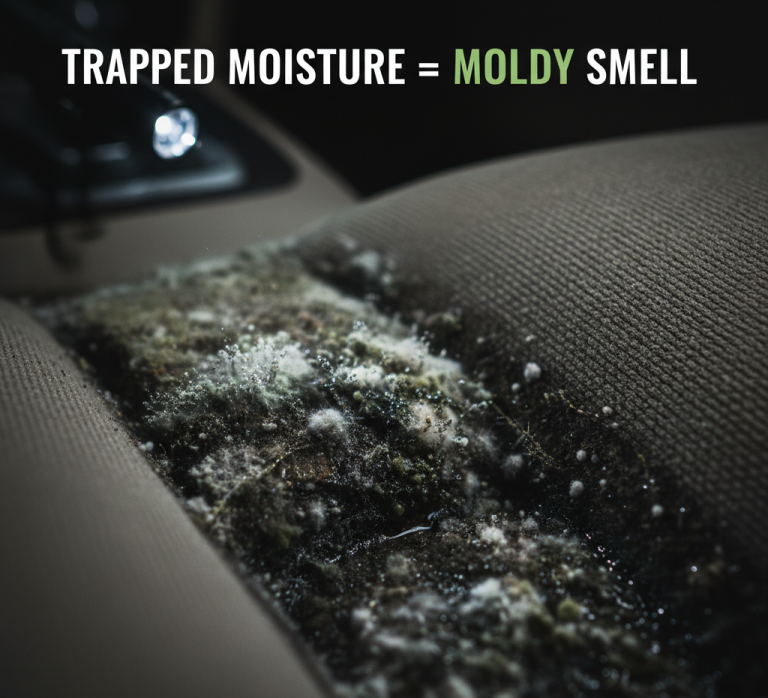
Pouring liquid soap directly onto your sofa saturates the underlying foam padding. The surface fabric might dry quickly, but the thick foam underneath remains damp for days. This trapped moisture leads to mold growth and a lingering musty odor.
As the foam slowly dries, it pushes dirty water back up to the surface. This creates a distinct brown water ring around the original spot. Always apply your cleaning agent to a microfiber towel first, then gently dab the upholstery.
5. Skipping the Crucial Rinse Step
Most commercial stain removers contain heavy surfactants designed to lift grease. If you leave these chemicals in your carpet after the dirt is gone, they continue working. The sticky residue attracts dust and grime from the bottoms of shoes.
Within a few weeks, a dark, muddy patch will appear exactly where you cleaned. You must rinse the treated area with plain water to remove all soap. Blot the area thoroughly with a dry towel to extract the remaining moisture and residue.
6. Using Acidic Cleaners on Porous Stone
Vinegar and lemon juice are popular natural cleaning alternatives. However, these acidic liquids instantly damage marble, travertine, and limestone countertops. The acid dissolves the top layer of the stone, a process called etching.
Etch marks look like dull, white, permanent water spots that cannot be scrubbed away. You must use a pH-neutral cleaner formulated specifically for natural stone surfaces. To restore etched stone, you often have to hire a professional to polish the surface entirely.
7. Spraying Polish Directly Onto Wooden Furniture
Aiming a spray bottle of furniture polish directly at a wooden table creates an uneven finish. Aerosol propellants and heavy oils concentrate in one spot, forming a cloudy layer over time. This silicone buildup attracts dust and darkens the wood grain unnaturally.
To avoid this, spray the polish onto a soft cotton cloth away from the furniture. Wipe the cloth over the wood following the direction of the grain. Buff the surface immediately with a second, dry cloth to remove any excess oil.
8. Tackling Window Smudges in Direct Sunlight
Washing windows on a bright, sunny day practically guarantees a terrible result. The heat from the direct sunlight causes the liquid cleaner to evaporate before you can wipe it away. This rapid drying leaves the soap surfactants baked onto the glass as stubborn streaks.
Choose an overcast day to handle your glass surfaces and mirrors. Start at the top of the pane and work your way down to catch any drips. Use a squeegee or a specialized glass weave microfiber cloth for a flawless finish.
How to Choose the Right Cleaning Solution?
Selecting the correct chemical agent prevents accidental discoloration. You must match the product to both the spill type and the surface material.
Understanding the pH Scale for Household Chores
Alkaline solutions, like baking soda and ammonia, excel at cutting through heavy grease and oil. Acidic solutions, like white vinegar, easily dissolve mineral deposits, hard water stains, and rust. Using the wrong pH level neutralizes your efforts or burns the material.
Always read the manufacturer’s label to determine the pH level of your supplies. Never mix acidic and alkaline products, as they will cancel each other out. Keep a balanced, pH-neutral soap on hand for delicate, everyday wiping tasks.
When to Use Enzyme Destroyers?
Enzymes are beneficial bacteria that consume biological matter until nothing remains. They are strictly designed for organic messes like food spills, vomit, and pet accidents. These formulas require time to work, often needing to sit wet for up to 24 hours.
Cover the treated area with a damp towel to keep the enzymes active and feeding. Once the spot is completely dry, vacuum the area to remove the broken-down particles.
The Role of Oxygen Bleach
Chlorine bleach strips color from fabrics and rapidly degrades cotton fibers. Oxygen bleach, also known as sodium percarbonate, offers a color-safe alternative for lifting tough marks. It releases oxygen bubbles that gently break the bonds between the dirt and the fabric.
Mix oxygen bleach powder with warm water just before you plan to use it. The solution loses its cleaning power within a few hours of mixing. Test this solution on an inconspicuous corner of your rug before treating the center.
Surface-Specific Stain Removal Guidelines
Different materials require entirely different maintenance strategies. Follow these specific rules to protect your specialized home finishes.
Rescuing Delicate Velvet and Silk
Velvet and silk do not tolerate liquid saturation or heavy friction. Water permanently crushes the velvet pile, leaving distinct rings on smooth silk panels. You should use a dry-cleaning solvent for these high-end fabrics.
Apply a light coating of solvent to a cloth, then dab the mark gently. Use a soft-bristled brush to restore the nap of the velvet once the area dries. When in doubt, consult a professional upholstery cleaner to handle these expensive materials.
Restoring Painted Drywall Safely
Scrubbing a scuff mark off a painted wall often removes the paint right along with the dirt. Matte and eggshell paint finishes are highly susceptible to burnishing and discoloration. Using a magic eraser on dark paint will leave a permanent, shiny bald spot.
Mix a few drops of dish soap into a bucket of warm water. Use a soft sponge to wipe the wall with minimal pressure. Dry the wall immediately with a microfiber cloth to prevent watermarks from running down the drywall.
Lifting Grease from Kitchen Grout
Grout is highly porous and instantly absorbs grease splatters from the stove. Mopping pushes dirty water into the grout lines, turning them black over time. Bleach only temporarily lightens dirt; it does not actually extract the grease.
Create a thick paste using baking soda and hydrogen peroxide. Apply the paste directly to the grout lines, then let it sit for 10 minutes. Scrub the lines with a stiff, narrow brush and wipe away the lifted grime.
Recommended Toolkit for Spotless Interiors
Having the correct equipment prevents panicked, incorrect reactions to spills. Keep these items stocked in a portable caddy for immediate access.
- White microfiber cloths prevent dye transfer and absorb liquids quickly.
- Soft-bristled toothbrush: Gently agitates dirt out of tight crevices.
- Plastic scraper: Lifts dried gum or candle wax without scratching surfaces.
- pH-neutral dish soap: Cuts grease safely on almost any surface.
- Enzymatic spray: Handles all organic and biological messes.
The Environmental Protection Agency suggests looking for its “Safer Choice” label when stocking your toolkit. This ensures the products are formulated to be effective without relying on overly harsh compounds.
Conclusion
Protecting your home requires patience and the correct application of chemistry. By avoiding common interior cleaning mistakes that leave stains, you preserve the life of your furniture and flooring.
Always remember to blot rather than rub, match your cleaner to the surface, and thoroughly rinse away any chemical residue. When you handle spills calmly and methodically, your living space will remain pristine and welcoming for years to come.