
")
I’ll never forget the look on my neighbor’s face when his sedan died on the highway, 30 miles from home. He’d been ignoring the low oil pressure light for weeks. “It only flashed for a second,” he said.
That flash cost him a $4,200 engine replacement. The thing is, checking your car’s fluids isn’t rocket science. It’s a 10-minute monthly ritual that can save you thousands in repairs and keep your car running reliably for years.
Most people know they should check their fluids, but they don’t because it feels intimidating. Where’s the dipstick? What’s a reservoir? Is it okay to check the coolant when the engine is hot?
1. Engine Oil – The Lifeblood
Oil is the most critical fluid after fuel. It lubricates every moving part inside your engine, pistons, bearings, and camshafts. Without enough oil, or with oil that’s degraded, metal grinds against metal, and your engine can seize in seconds.
How to check it properly:
- Park on level ground and turn the engine off: Let it sit for at least 30 seconds (longer if it was running hard) so the oil can drain back into the pan.
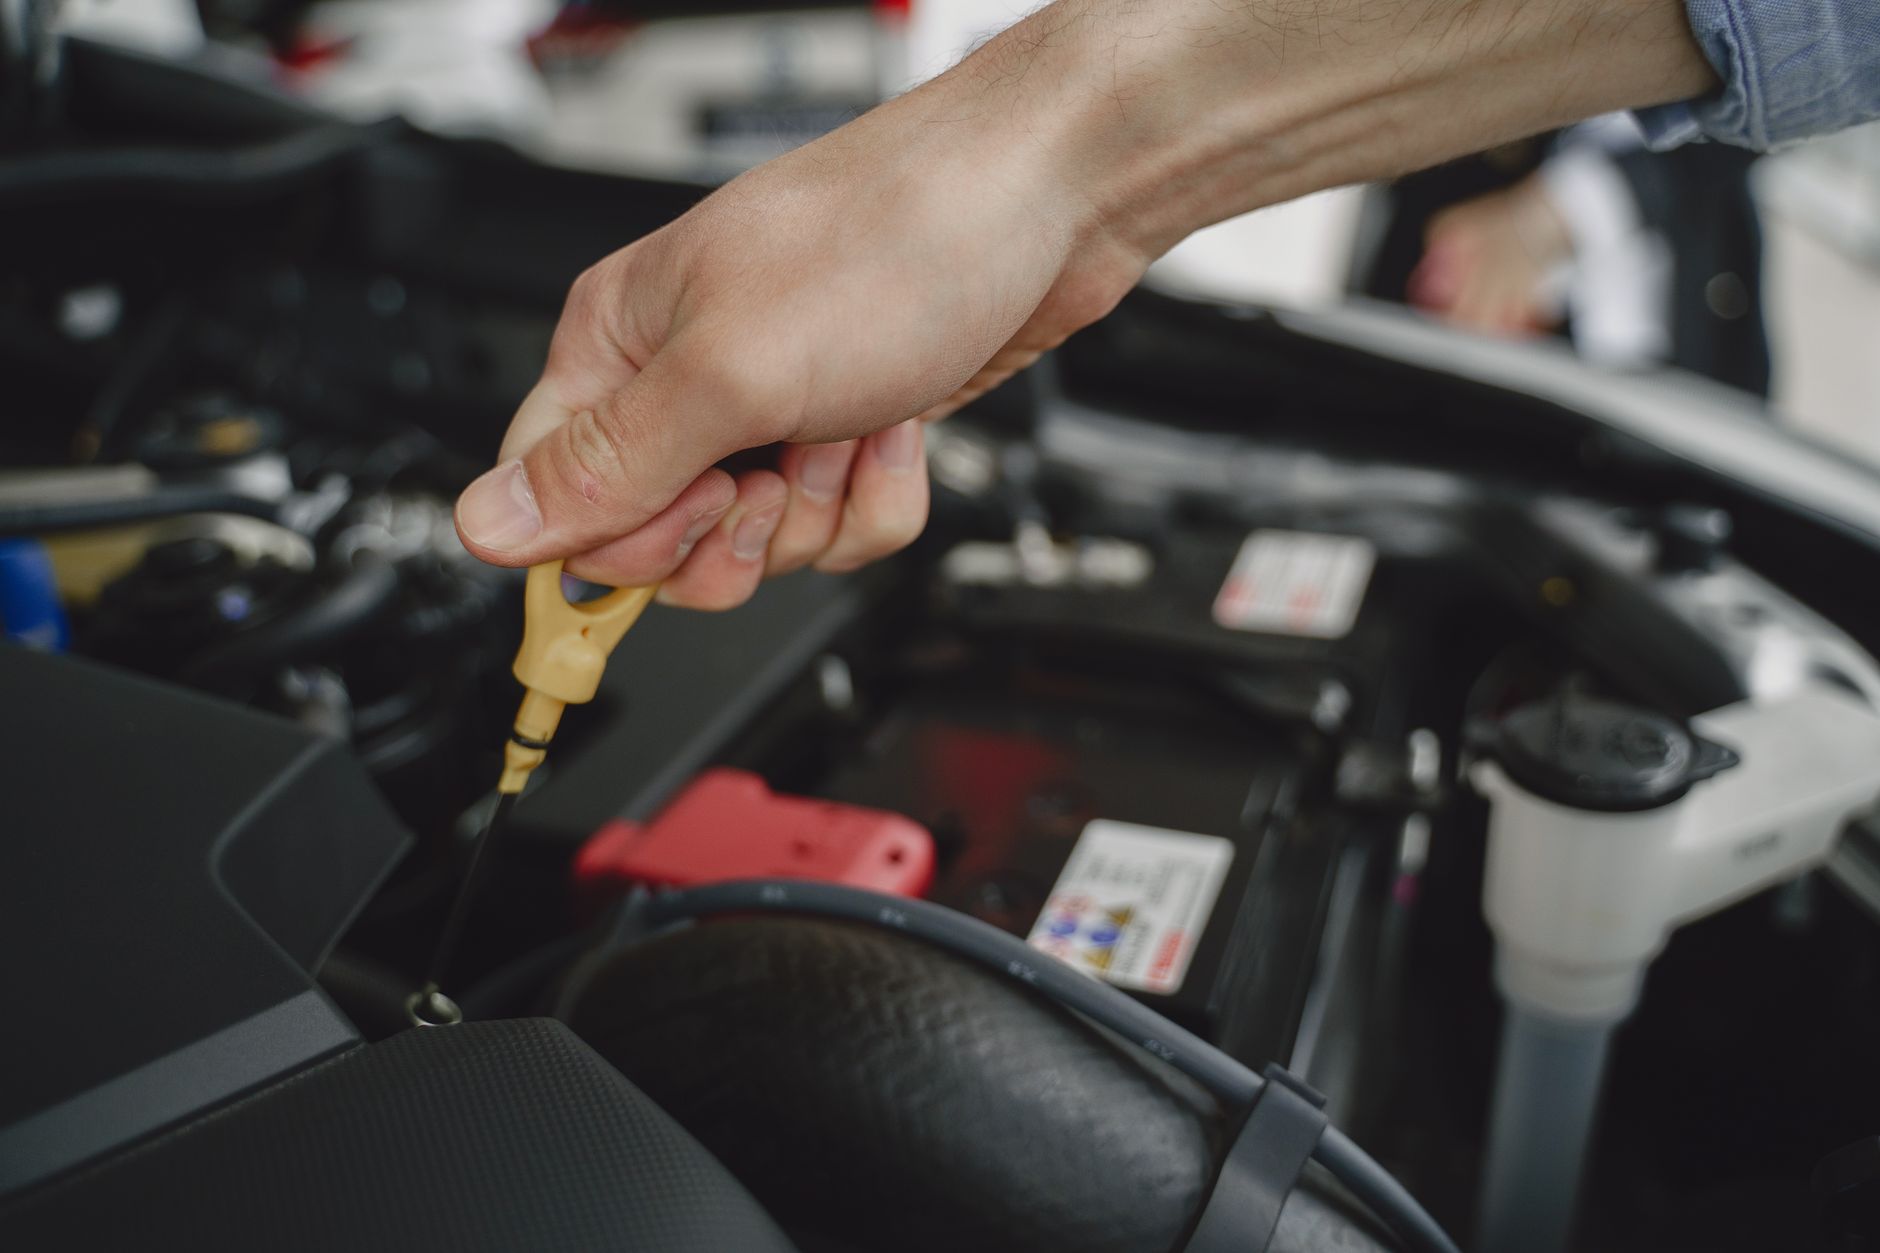
- Open the hood and locate the oil dipstick: It usually has a bright yellow or orange handle, sometimes marked with a drop of oil.
- Pull the dipstick out, wipe it clean with a paper towel or shop rag, and push it back in all the way until it seats.
- Pull it out again and look at the level. You’ll see two marks: a low (L or MIN) and a high (H or MAX). The oil should be between those marks, ideally closer to the high side.
- If it’s near or below the low mark, add oil immediately. Remove the oil fill cap (usually on top of the engine, with an oil can symbol) and pour in a small amount. A funnel helps avoid spills. Add about half a quart at a time, then recheck the dipstick. Do not overfill; too much oil can cause foaming and damage.
What does the oil tell you about your engine’s health?
A quick look at the oil on the dipstick gives you more than just a level. After you wipe it, put a drop on your fingertips and rub it.
Fresh oil feels slick and smooth and looks amber or golden. If the oil feels gritty or has tiny particles, internal engine components are wearing down; that’s a red flag. If the oil looks milky or frothy, coolant (water) may be mixing with the oil, which could mean a blown head gasket or cracked block.
Also check the underside of the oil fill cap for white or tan sludge; that’s another sign of condensation or coolant contamination.
Last winter, a customer came into my shop worried about a “weird smell” when he drove. I checked his oil; it was thick and brown like gravy, and the dipstick had a greasy film. He admitted he hadn’t changed the oil in over 18,000 miles.
We did a flush and new oil, and his engine was fine, but the sludge had already started restricting oil passages. Another 5,000 miles and he’d have been looking at a rebuild. Regular checks would have caught it early.
A common mistake: People check the oil right after turning off the engine. That reading will be falsely low because much of the oil is still in the upper engine. Always wait at least 30 seconds for it to drain back.
2. Coolant – Keep It Cool
Your engine produces enough heat to melt metal if it’s not properly cooled. Coolant (a 50/50 mix of antifreeze and water) circulates through the engine block, absorbs that heat, and releases it through the radiator.
Without enough coolant, the engine overheats, warps cylinder heads, and can crack.
How to check it safely:
- Wait for the engine to cool completely. I cannot overstate this. Pressurized coolant can reach over 250°F and will spray boiling liquid if you open the radiator cap. Wait at least two hours after driving, ideally overnight.
- Find the coolant reservoir: a translucent plastic tank, usually white or yellow, with “Full Cold” and “Full Hot” markings on the side. On most modern cars, you check the level here, not the radiator cap.
- The coolant level should be between the “LOW” and “FULL” marks when cold. If it’s below “LOW,” add the type of coolant specified in your owner’s manual (never just water, unless it’s an emergency). Use a funnel to avoid spills.
- For older vehicles, you may need to remove the radiator cap to verify the fluid is all the way up to the top of the neck. Again, only do this when the engine is stone cold.
What to look for:
Healthy coolant is bright green, orange, pink, or blue (depending on the type). If it looks rusty brown, it’s contaminated and should be replaced. If it looks oily or greasy, there could be a head gasket leak mixing oil with the coolant.
A common early symptom of a coolant leak is a sweet smell inside the cabin (from the heater core) or puddles under the front of the car.
A few years back, a friend called me from a highway rest stop, panicked. His temp gauge was pegged in the red. He’d checked the coolant while the engine was running hot, cracked the cap, and got sprayed with steam.
He ended up with minor burns on his arm. We towed it in, and the only real damage was a blown radiator hose, a $40 fix, but his impatience cost him a tow and a lot of pain. Patience saves money and skin.
3. Power Steering Fluid
Most cars with hydraulic power steering rely on a special fluid to transmit pressure and reduce friction when you turn the wheel. (Some newer cars have electric power steering, which has no fluid; check your manual.)
How to check it:
- Locate the power steering reservoir. It’s often a small, black or white plastic tank near the front of the engine, with a cap marked “Power Steering” or a steering wheel icon. Some vehicles have a dipstick integrated into the cap.
- With the engine off (or idling, depending on your vehicle; check your manual), remove the cap or dipstick, wipe it clean, reinsert it, and read the level.
- The fluid should be between the MIN and MAX marks. If low, add only the specific fluid recommended by your manufacturer (e.g., Dexron VI ATF, Mercon V, or a dedicated power steering fluid). Never mix different types.
- If you find yourself topping it off more than once a year, you almost certainly leak. Have the system inspected before you lose steering assistance at a critical moment.
Pro tip: Power steering fluid typically looks reddish or clear. If it’s dark brown or smells burnt, the system needs flushing. I once saw a car that had been running on burnt fluid — the pump whined like a stuck pig. A $150 flush saved the $600 pump.
4. Brake Fluid
Your brakes are hydraulic; they rely on fluid pressure to clamp the pads against the rotors. A leak or low level will compromise the stopping power. Brake fluid also absorbs moisture over time, which lowers its boiling point and can lead to brake fade.
How to check it:
- The brake fluid reservoir is usually located on the driver’s side of the engine bay, near the firewall, often under a small black plastic cover. It’s connected to the master cylinder (a metal block with brake lines coming out of it).
- The reservoir is translucent with MIN and MAX lines. The fluid should be between them. If it’s below MIN, top it off with the DOT specification listed in your owner’s manual (usually DOT 3, DOT 4, or DOT 5.1). Do not mix different DOT types.
- Look at the fluid itself. New brake fluid is almost clear with a slight yellow tint. If it’s dark brown or black, it’s old and should be replaced. If it looks milky or has particles, the water has contaminated it. Flush the system immediately.
Important: If your brake fluid level is consistently dropping, but you don’t see any external leaks, the fluid may be bypassing the master cylinder seals and going into the brake booster.
That can cause a spongy pedal and eventual brake failure. Brake fluid is the one fluid I recommend that even home mechanics bring to a shop for major repairs, but checking the level is easy and can warn you of trouble.
5. Clutch Fluid (Manual Transmissions)
If you drive a manual transmission with a hydraulic clutch, your clutch pedal uses fluid to disengage the clutch. The reservoir is small and located near the brake master cylinder, often to the left and slightly lower.
How to check it:
- Find the clutch reservoir, usually a separate, smaller plastic tank. Some older cars use a metal reservoir with a screw-off cap.
- The level should be between the MIN and MAX marks. If low, add brake fluid matching the DOT spec in your manual (because clutch and brake systems use the same fluid). Do not overfill the system expands when warmed up.
- If you need to add fluid more than once a year, suspect a leak in the slave or master cylinder. A leaking clutch master cylinder can drip fluid onto the driver’s side floor mat.
6. Transmission Fluid
Transmission fluid cools and lubricates the gears, clutches, and valves inside your transmission. Low or degraded fluid can cause hard shifts, slipping, or total transmission failure.
Check procedure (most automatics):
- Start the engine and let it idle until the transmission is at normal operating temperature (warm, not hot). Park on level ground, set the parking brake, and chock the wheels.
- With your foot on the brake, cycle through all the gears (Park → Reverse → Drive → Low), pausing for a few seconds in each. This ensures the transmission is filled.
- Return to Park (or Neutral, if your manual says so — check it). Leave the engine running.
- Locate the transmission dipstick. It’s usually near the back of the engine, often longer than the oil dipstick, with a red or yellow handle (sometimes labeled ATF).
- Pull the dipstick, wipe it clean, reinsert it fully, and pull it out again. The fluid should be between the two crosshatched marks or the “HOT” range.
- Fluid color: healthy automatic transmission fluid is reddish or deep amber. If it’s dark brown or smells burnt, the transmission needs service. If it’s foamy (bubbles on the dipstick), there’s too much air in the fluid — overfilling or a leak can cause that.
- To add fluid: use a funnel in the dipstick tube and pour a small amount (maybe 4-6 ounces) at a time. Transmission fluid can ignite if it spills on a hot exhaust manifold, so wipe up any drips immediately. Recheck the level after a few minutes.
Manual transmissions often don’t have a dipstick; you check the fluid level through a side plug on the transmission case. That’s usually a job for a shop unless you have a lift and can safely access the fill hole.
I had a customer who came in complaining of a “shudder” when accelerating. I checked his transmission fluid it was low by about a quart. He told me he’d never even thought to check it.
After topping it off and doing a partial drain-and-fill (his fluid was dark), the shudder disappeared. Saved him at least $2,000 vs. a rebuild. Transmission fluid gets ignored more than any other fluid, except maybe brake fluid.
7. Windshield Washer Fluid
This one doesn’t affect engine longevity, but it’s critical for safety, especially in winter or when driving through mud and bugs. It’s also the easiest fluid to check and fill.
How to do it:
- Find the windshield washer fluid reservoir. It’s a plastic tank, usually blue or white, with a cap that shows a windshield/washer icon.
- The tank is semi-transparent; you can see the fluid level through the plastic. If it’s low, simply open the cap and pour in the fluid until the tank is full. There’s no dipstick or markings; just fill it up.
- Choose the right fluid for your climate: freeze-resistant formulas with a higher methanol content for winter, bug-removal formulas for summer, or all-season. In sub-zero temperatures, plain water will freeze and crack the reservoir or pop the pump seals.
Pro tip: If the washer fluid doesn’t spray, check the nozzles first (often clogged with wax or dirt). Also, listen for the pump motor if you hear it whirring, but no fluid comes out, the tank might be empty, or the line could be frozen or blocked. A bottle of washer fluid costs $2–$4. Don’t drive blind.
Conclusion
Checking your car’s fluids is the single best thing you can do between oil changes to keep your car healthy and avoid surprise breakdowns.
The whole under-hood inspection takes about 10 minutes once you know where everything is. Make it a habit: pick one day each month (maybe the first Saturday) and run through the checklist.
Over time, you’ll learn what “normal” looks like for your car, and you’ll spot problems before they become catastrophes.
Frequently Asked Questions
How often should I check my car’s fluids?
Engine oil should be checked at least once a month. Coolant, brake fluid, power steering fluid, and transmission fluid can be checked every time you change the oil (every 3,000–5,000 miles or every 6 months). Washer fluid, you check whenever it stops spraying.
What does it mean if my oil looks milky or frothy?
Milky oil means water or coolant is mixing with the oil. This can happen due to condensation (short trips in cold weather where the engine never fully warms up) or a leaking head gasket, cracked block, or bad intake gasket. Condensation often clears after a long drive; if the milkiness persists after a 30-minute highway run, you likely leak. Have it checked immediately; driving with coolant in the oil can destroy bearings quickly.
Can I check transmission fluid when the engine is off?
No. Transmission fluid expands when hot, and the pump needs to be running to fill the torque converter and valve body. Always follow the procedure: engine idling, transmission in Park, warmed up. Checking it cold with the engine off will give a false reading.
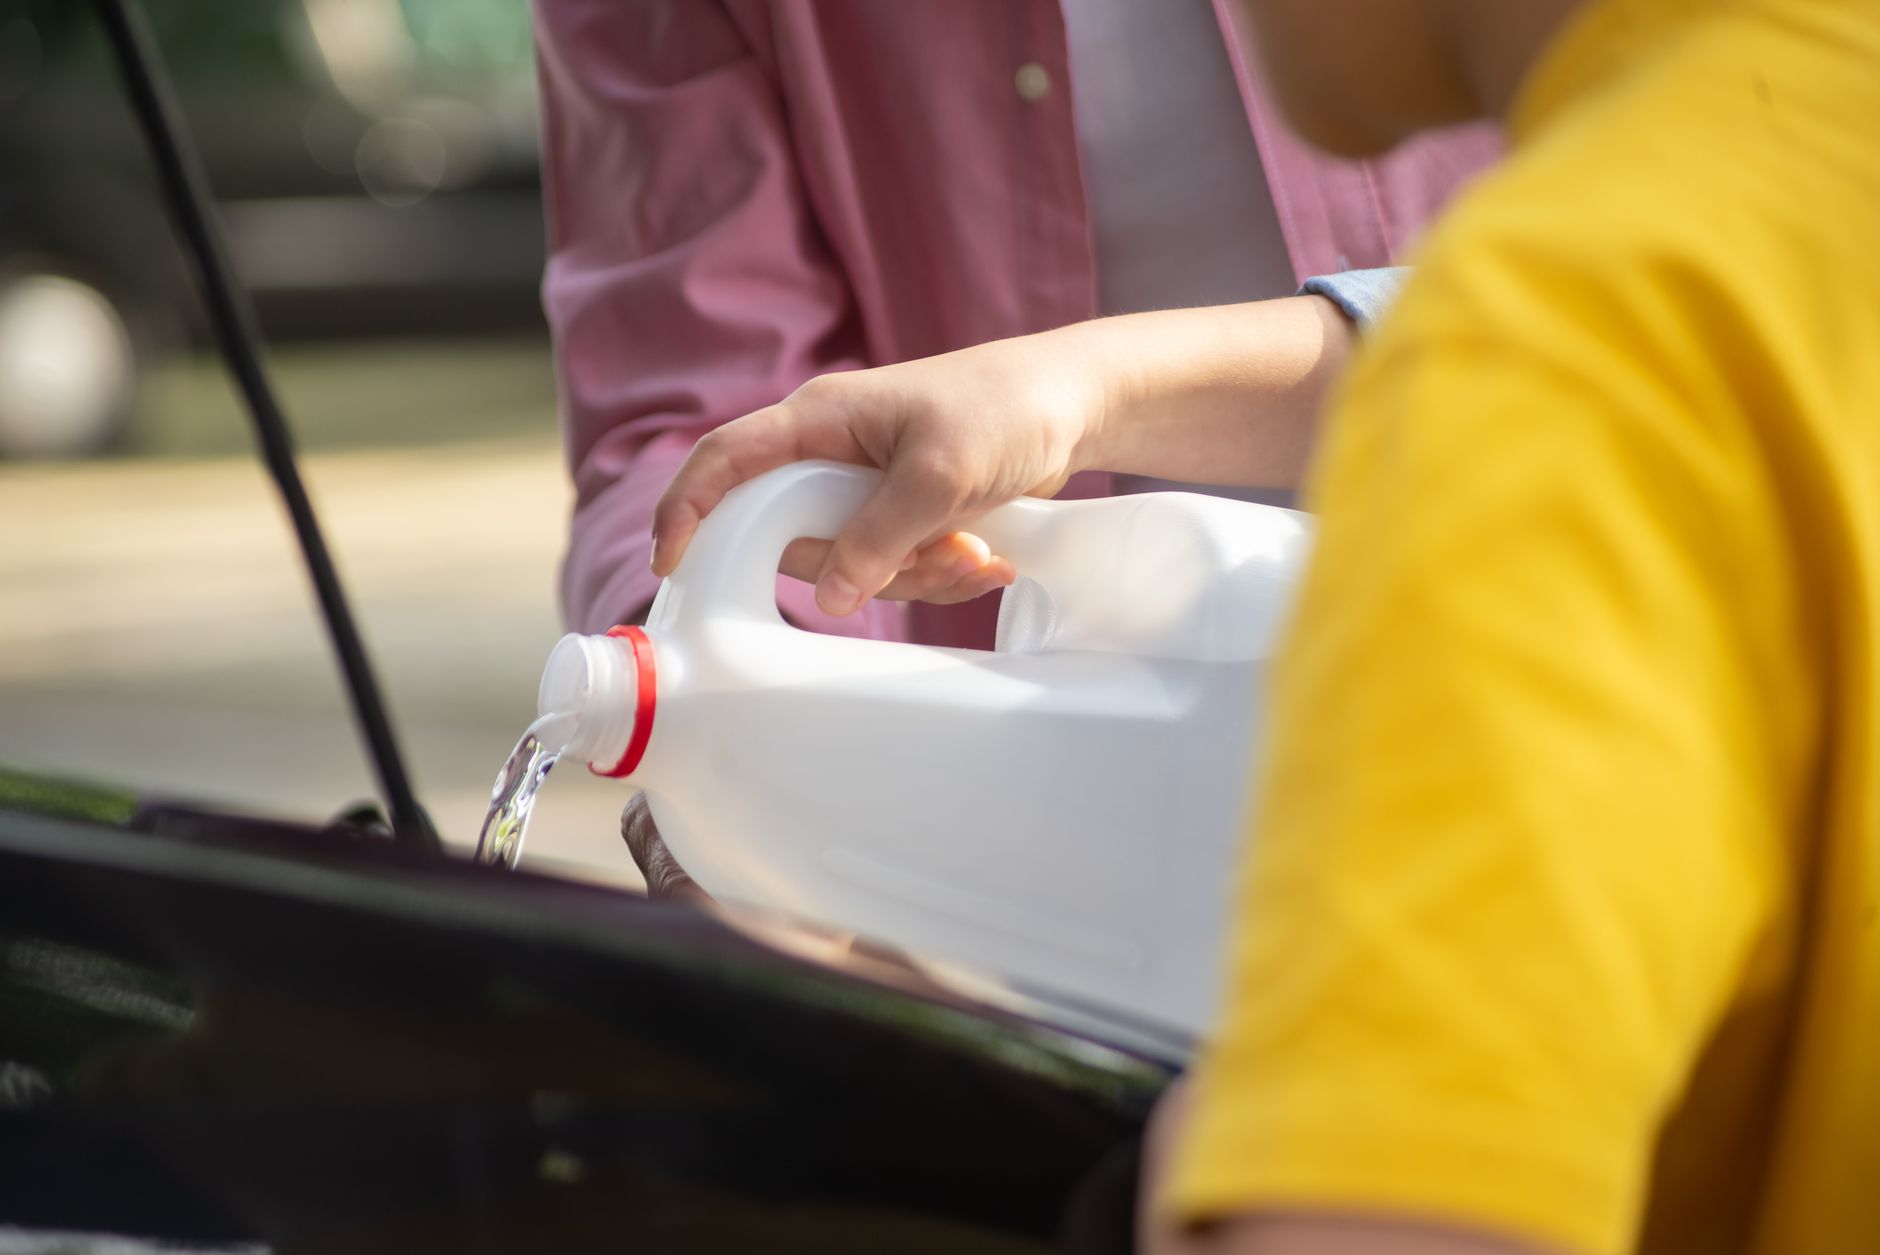
I topped off my coolant with pure water because that’s all I had. Is that okay?
In an emergency, a small amount of pure water (especially distilled) is better than running low. But you should replace it with the proper 50/50 mixture as soon as possible. Pure water has no corrosion inhibitors and a lower boiling point than coolant. Long-term use can cause rust, scale, and overheating.